Sunland Analytical |
|
Phone (916)852-8557 |
Collecting A Sample
Check It All For Corrosion Potential
A comprehensive evaluation of factors that point to a corrosive soil allows for better planning. This analysis package includes factors like redox potential and Sulfate reducing bacteria for your consideration." |
Know As Much As You Can |
General Aspects of Sample Collection
For whatever reason (a better yield for a corn crop, to stop your lawn from dying, the
state requires it, etc.) you have decided that you need to have some kind of analysis done. If you are
going to have it done, you should get the most for your time and money. You may consider that
this is dependent on the test methods and how well the lab carries out these methods. Of course, in
part, that is true. However, remember that laboratory analysis is our profession and Sunland goes to great
effort with it's quality controls; calibrating instruments before every set of analyses and after every
tenth sample; testing samples of known content (Purchased from U.S. Standards agencies) and much more.
So the probability that you will get an incorrect answer from the laboratory is small. However,
if in collecting soil for analysis you place it in a bucket that has recently contained fertilizer, I
guarantee you that the results of the analysis on this sample will not reflect the true soil conditions.
The point is, of course, that the way you collect the sample is one of the most important aspects
of getting meaningful, useful analytical results.
There are two types of general sampling processes the first is the individual
"point" sample that allows absolute analytical analysis values to be determined
at the very spot where the sample was obtained. To use this sampling method to establish analytical
values over an expanded area requires a very specific sampling plan established mathematically to insure
that the final results will be statistically meaningful. Sunland will be pleased to help you establishing
such a plan if this sampling method is required. The second general method is a composite sample. The
composite sampling method requires that several samples be taken from the site of interest, these samples
are then mixed and a portion is submitted for analysis. The composite sampling method is used most commonly
for agriculture and landscape.
Though the composite method is similar in it's usage for agriculture (see -
agriculture soil sampling) or landscape (see -
landscape soil sampling) there are obviously differences in the amount of area
to be evaluated. Similarly, analysis of plant leaves (see- plant
tissue sampling) can readily be accomplished for agricultural crops or garden plants,
but their functional utilization varies significantly. Water sampling for irrigation suitability
does require some specific steps (see - water for irritation) and
analysis of drinking water for microbiological purposes (see - water for microbiology)
requires that you obtain a sterilized container from Sunland as well as following some very specific requirements.
Agricultural Soil Sampling
SEND SAMPLES TO
Collecting a soil sample for agricultural purposes generally has the advantage that
there is a significant history available on the plot and that the soil is readily visible and accessible.
Assuming generally uniform visual characteristics to the site a single sample can be representative
of up to 40 acres. A minimum of 8 sub samples should be taken from the top 12 inches at varying areas
of the field, mixed and approximately one pound submitted for analysis. Avoid unusual areas when obtaining
a representative sample. Areas that show poor growth need to be sampled separately.
Sunland Service Since 1989
For 20+ years- reports on time,
- in a short time.
- & an excellent price!
Plant Tissue Sample
Plant tissue analysis is the optimal method for management of orchards,
grapes and similar crops where the plants are maintained over many years.
Problems with row or field corps can be rapidly diagnosed by the use
of plant tissue analysis. Considerable data is available to provide indications
when a specific nutrient is below, adequate or excessively present in
these plants. Less information is available for horticultural plants,
but very significant information can be realized by making direct comparisons
between the analysis of normally growing plants and those having problems.
The rule of thumb for all plant tissue analysis is to take the forth leaf back from the
growing tip of the branch. For a representative sample from a field or garden collect a leaf from different
plants spread out over the entire growing area. For plants (individual or group) having a specific problem
limit sampling to only the affected plants. To provide ample amount of tissue for analysis and a representative
sample collect 20 leaves from plants with large leaves (i.e. walnuts, grapes, camellias)
and 40 leaves from plants with smaller leaves (i.e. almonds, prunes, roses) Leaves collected should be placed
in a paper bag to allow plants to dry. They need not be refrigerated and they should not be put in plastic
or plastic lined bags (be sure to label bag).
The following is a list of some plants where the general rule of sampling
(i.e. forth from growing tip) may be difficult to interpret.
|
| CROP
| MATERIAL TO COLLECT
| AMOUNT
|
|
| |
Alfalfa |
Upper 1/3 of plant |
20 |
|
| |
Asparagus |
Fern above 20 inches |
20 |
|
| |
Corn pre tasseling |
1st developed leaf below whorl |
20 |
|
| |
Corn post tasseling |
Leaf opposite and under ear |
20 |
|
| |
Grape |
Leaf Petiole opposite bloom or cluster |
20 |
|
| |
Rice and other small grains |
Most fully mature leaf |
20 |
|
| |
Root Crops (carrots, beets.) |
Center mature leaves |
40 |
|
| |
Sugar Beet |
Petiole from youngest leaf to attain max size |
20 |
|
Landscape Soil Sampling
SEND SAMPLES TO
>
It is assumed that landscape samples will be collected from sites that are one acre or less and
is suggested that a separate sample be collected for each acre to be landscaped. This "rule of thumb"
stems from the typical unknown soil character, soil variability and lack of plant growth history of these sites.
The most important point to remember for soil analysis is that ”the soil analysis can only
be as good as the sample provided. Following these steps will provide you with a reasonable assurance of obtaining
a representative sample for analysis.
In Tues Out Fri - In Fri. Oun Wed.
For 20+ years- reports on time,
- in a short time.
- & an excellent price!
- Clean sampling
tools and use clean plastic bucket for mixing sub-samples. Clean
is emphasized because materials last in the bucket may show up
in your analysis.
- The depth of the sample can be determined by a common sense rule
ofthumb. Where are the roots of the plants going to be? Surface growing
plants would have samples at 6 in. while trees or plants with deeper
root systems should have samples taken from 12, 18, or 24 in.
- Take at 5-10 sub-samples in small areas (or even a pile of fill).
Thoroughly mix these sub samples and submit about 1 pound for analysis.
- Avoid unusual areas when obtaining a representative sample. Areas
that show poor growth need to be analyzed separately. Get the most
from your analysis by taking the time to obtain a representative sample.
Compost Sampling
SEND SAMPLES TO
>
Compost Collection - The complex process of composting causes different rates of material degradation, heating and
chemical release and can result in significant variation in the chemical composition in different regions of the pile or
windrow. This happens even though the material is regularly turned and mixed. To acquire a representative sample it is
suggested that sub-samples are taken approximately every four feet along the windrow. At each sample site an equal size
sample (approx. 1 pint) should be collected from near the surface, at he center of the pile or windrow and a third sample
about half the depth to the center. Mix the sub-samples from approximately 20 feet of a windrow in a clean five gallon
bucket. Submit about a quart of the mixture in a 2 quart plastic bag.
Water Agricultural Suitability Sampling
It is important that water to be tested is representative of the source
and is not contaminated by sediment or rust from the pipes at the site
of collection. Therefore, fully open the valve and allow the water to
flow for 3 to 5 minutes. Fill and empty the sample container three times
to completely rinse out the container. Fill the container (approximately
one pint) and submit for analysis. If quantitation of varying forms of
nitrogen (total nitrogen, ammonia, nitrate) are of importance, the sample
should be kept cool and submitted to the lab on the same day as collected.
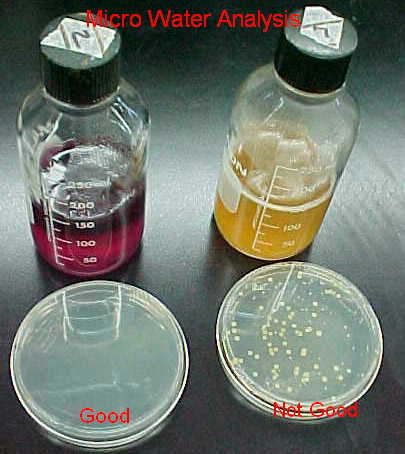
Water Microbiology Sampling
The sample must be collected in a ”STERILIZED" container (available
from Sunland). The volume of sample should be sufficient to carry out all tests required, preferably
not less than 100 mL. When the sample is collected, leave ample air spacein the bottle (at least 1 inch)
to facilitate mixing by shaking, before analysis. Keep sampling bottle closed until it is to be filled.
Remove cap as a unit: do not contaminate inner surface of cap and neck of bottle. Fully open the water valve and
allow the water to flow for 3 to 5 minutes. Fill container without rinsing, replacing cap immediately. Accompany
samples by complete and accurate identifying and descriptive data. ” Samples will not be accepted for
analysis be accepted for analysis without the following information: Sampler's name, Sample Location
Identification, Time and Date sampled.
PREPARATIONS BEFORE TAKING WATER SAMPLES
Potable (Drinking) Water
Open tap fully and let water run to waste for 3 or 5 min. or for
a time sufficient to permit clearing the service line. Reduce water flow to permit
filling bottle without splashing. If tap cleanliness is questionable, apply a solution
of sodium hypochlorite (household bleach) to faucet before sampling; let water run for an
additional 2 to 3 min after treatment. Do not sample from leaking taps that allow
water to flow over the outside of the tap. In sampling from a mixing faucet remove
faucet attachments such as screen or splash guard, run hot water for 2 min. then cold
water for 2 to 3 min. and collect sample as indicated above.
In drinking water evaluation from distribution systems, collect samples of
finished water selected to assure systematic coverage during each month. Carefully
choose distribution system sample locations to include dead-end sections.
Waste Water
SEND SAMPLES TO
In collecting samples directly from a river, stream, lake, reservoir,
spring, or shallow well, obtain samples representative of the water that is the source of supply
to consumers. It is undesirable to take samples too near the bank or too far from the
point of drawoff, or at a depth above or below the point of draw off.
Take samples from a river, stream, lake, or reservoir by holding the bottle near
its base in the hand and plunging it, neck downward, below the surface. Turn
bottle until neck points slightly upward and mouth is directed toward the current.
If there is no current, as in the case of a reservoir, create a current artificially
by pushing bottle forward horizontally in a direction away from the hand. Remove
from the water, pour off excess and cap.
Sample Transportation
If samples cannot be processed within 1 h after collection, use an iced
cooler for storage during transport to the laboratory. If it is known that the
results willbe used in legal action, employ a special messenger to deliver samples
to the laboratory within 6 h and maintain chain of custody. Analysis of drinking
water must be initiated within 30 hours from collection and analysis of waste water within 6 hr.